Smartphones may be vastly simpler to use in photography, at least compared to DSLR cameras, but that's not to say that you can't use a few photography tips. Just by knowing a few basic things, your photos will look several times better. Let's dive right into it!
1: Utilize Your Camera's Features And Lenses

Nowadays, most phones offer numerous camera features and extra lenses that you can use. The Mate 20 and the Galaxy A9 are only two good examples of that.
So, before bothering with anything else, learn to use the tools that you already have. Be it on software or on hardware, learning how to utilize it can make a huge difference.
Wide-angle, optical zoom, depth sensors, those things can be lifesavers if you learn when to use them. For an example, you can't use the wide-angle lens at all times as it'll capture more than you want to. But, if you need that extra bit of space to get everything in one frame, then that's definitely the right time to enable it.
Overall, before taking a shot, do take a moment to think of what kind of sensor you need to use. And with that being said, hardware utilization is only one thing. After that, you also need to learn how to shoot manually with whatever software you've got available.
2. Learn How to Shoot in Manual Mode
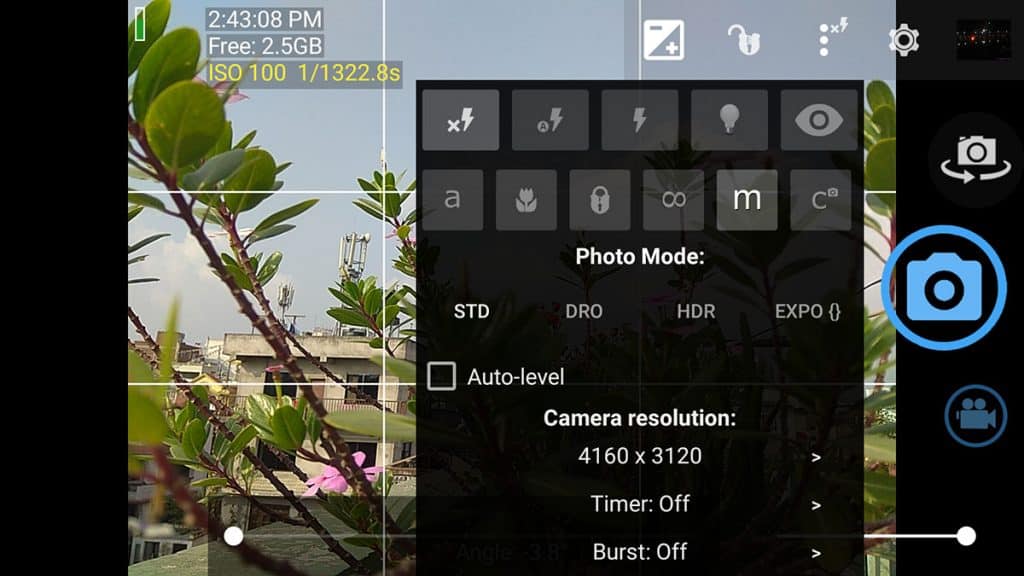
Taking pictures in auto mode is without a doubt the easiest and fastest way of capturing your favorite moments. Things like ISO, focus, and shutter speed all get set automatically in a matter of a split second and that can be a lifesaver in multiple scenarios.
However, no matter how much smarter our phones may have become over the past few years, they are still not conscious. Your device can't tell what you're trying to capture or what result you're trying to achieve.
Are you shooting something that's moving? An object that's sitting still? A landscape? In most cases, your phone just can't tell. And that's where manual mode comes in.
Now, this is a topic that would take a whole new article to explain in itself. But, we'll let you know the very basics. Spoiler alert, it's all about balance!
When it comes to shutter speed, longer shutter speed equals to brighter-looking images but also introduces a blurriness to everything that's moving. Faster shutter speed allows you to capture moving objects with ease, but can also darken your image and ruin the image quality. The exact numbers where this happens is something that highly depends on your phone's sensor.
ISO is mostly responsible for the brightness of your image. Generally speaking, lower is better because a higher ISO introduces image grain. But, there are times where you have no choice but to either increase it or use your flash. In the worst case scenario, both.
Last, but not least, focus points are responsible for, well, focus. There's Macro focus for close-ups, infinity for landscape shots or anything similar, fixed which tracks objects, and automatic along with manual.
A dedicated article can be written for each one of those things. So, let's leave that for another time.
3. Learn How to Take The Right Angles And Play Around With Image Editing

This is a photo that we recently took with one of our budget devices and it goes to show how much difference your angle makes regardless of your location. We're not professional photographers, but there is enough experience and knowledge to say that there are so many things that are both right and wrong in this image - depending on your preferences.
In this case scenario, a bit of an artistic effect comes out. The sky so bright that you can't see it, the trees only sitting at the corner of the image, the flowers only bright enough so that you can see them but not in detail.
This outcome can massively change depending on what you wish to capture. Your angle and perspective makes all the difference in the world.
For an example, if you wish to capture the flowers and the grass, you'll need to move to the side so that the sun won't be hitting you straight on. After that, you can go low and focus on the flowers while leaving the trees in the background.
It's your call really. But, what matters is having the knowledge that the angle does make a huge difference. So, do keep that in mind.
Overall, be creative, move around a lot before taking the shot, and try to think of what you want to capture.
After that, having some basic knowledge of image editing is a bonus as well. There's no need for fancy filters or anything like that. Simply adjusting the contrast, brightness, clarity, and warmth is enough to make a huge difference for the better.
Your phone's pre-installed editor app should allow you to do at least this much. If not, check out PicsArt. It gives you a lot of options including the ones that we mentioned above.
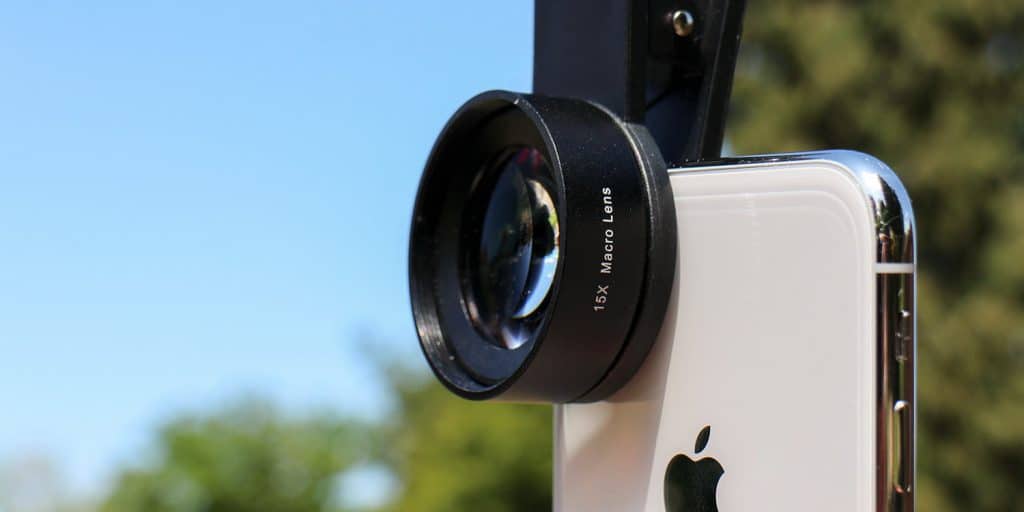
4. Consider Using External Lenses
Ever heard the phrase: "Jack of all trades, master of none"? That's basically what smartphones are.
They can do numerous things, including taking photos. But, the truth is that they are nowhere near as good as DSLR cameras. Not even close.
And it sucks to be limited by your hardware because unlike with software, there is not too much to do about it. Except, you could try using external lenses.
External lenses are fairly cheap and can make a huge difference in what you can achieve or not. From wide-angle lenses to optical zoom and macro focus, there's something out there for everyone.
Macro lenses are especially popular because our small phone lenses suck badly when it comes to focusing on extreme close-ups. So, picking up an external lens is definitely one of the best photography tips that we can give you right now!
You can choose which one to get for yourself and there are multiple to choose from in places like Amazon. So, take your time.
Smartphone Photography Tips: Conclusion
That concludes our beginner photography tips for now. If you've got the basics, then moving on to more advanced guides will prove to be easier down the road.
If you feel like we forgot to mention something important, then let us and everyone else know about it in the comments section down below!
Like what you see? Then don't forget to share this article with your friends! You can also follow us on Facebook and Twitter for the latest news, reviews, listicles, apps, games, devices, how-to guides, and more!