Wondering what’s the current state of Android rooting and how to install Magisk framework to get a taste of it? Here’s everything you need to know about Magisk, the Modules that comes with it, and how to use it.
The early lineup of

Since the Android community is always looking to push the limits, the tinkerers found a way to push the limits of freedom ever farther. With the introduction of rooting on Android, the definition of customization changed entirely, opening up doors to a brand new world. For years, the methods of rooting have been hands-on and posed a
What is Magisk systemless root?
The traditional way of rooting your Android device involved installing the SuperSU app, which essentially granted you superuser permissions. The SuperSU app developed by Chainfire allowed you to override the system restrictions placed forth by Google on Android OS. From giving you the ability to overclock the processor of your device to improve performance, to fine-tune the Doze Mode and get more screen-on time, rooting essentially allows you to unleash the capabilities of your Android device.

However, the downside to SuperSU is that it modifies the system files, which does have unintended consequences for the users. The downside to this is that you end up voiding the warranty of your Android device. Additionally, rooting also raises red flags with Google, since it gets detected by Google’s SafetyNet radar for added protection. When the SafetyNet feature detects that the system files have been modified (aka the device is rooted), it automatically restricts certain high-security apps from working.
This is where the systemless root through the Magisk framework was introduced, breaking the barriers put forth by SafetyNet. The entire reason behind the urge to learn how to install Magisk framework on Android is since it grants you the ability to use apps such as Pokémon GO, Netflix, Google Play Store and banking apps as well.
Advantages of Magisk Systemless Root
If you’ve been in the Android environment long enough, then there’s no need to educate you on rooting. But what makes one method of rooting, namely Magisk systemless root better than the regular and traditional SuperSU method? There is more than just one reason why Magisk is quickly finding its way into the mainstream rooting community. But before we dive into everything that makes Magisk phenomenal, we must disclose the primary reason why it isn’t perfect. Unlike traditional rooting methods that work with device with locked bootloaders, Magisk systemless root can only be installed on a device that has an unlocked bootloader.
1.No system partition modification
The biggest pain point about the SuperSU root developed by Chainfire is the fact that it is highly system-intensive. Putting it in simpler terms, flashing the Magisk systemless root means that the installation is cleaner which reduces the risk factor. Since there is no addition or modifications to the devices’ system partition, Magisk is a stable method of rooting.
2.Unrooting is easier
Whether you want to unroot your device to get the default look and feel of your Android or want to sell your phone, the process can be vigorous. However, with Magisk systemless root, getting to stock Android is easier, since all you need to do is factory reset. Although losing root access after a factory reset isn’t ideal, you can always get the root access back using the Magisk installer just like you’d install an app.
3.OTA updates supported
Once you have rooted your Android device with the traditional SuperSU, you are disconnected from the OTA updates cycle. The only way for you to update your Android device running SuperSU is by flashing a stock ROM file. However, with the systemless Magisk root, you still get notified by the manufacturer and can always install the latest updates.
4.Unrestricted usage
There is no denying the fact that root also comes with a bunch of security loopholes along with the freedom. For instance, a bunch of security-intensive apps do not work with rooted devices, but Magisk seems to be exception. With a feature called Magisk Hide, you can veil the existence of root from certain apps. This helps you enjoy the goodness of root along with the ability to use Android in its entirety.
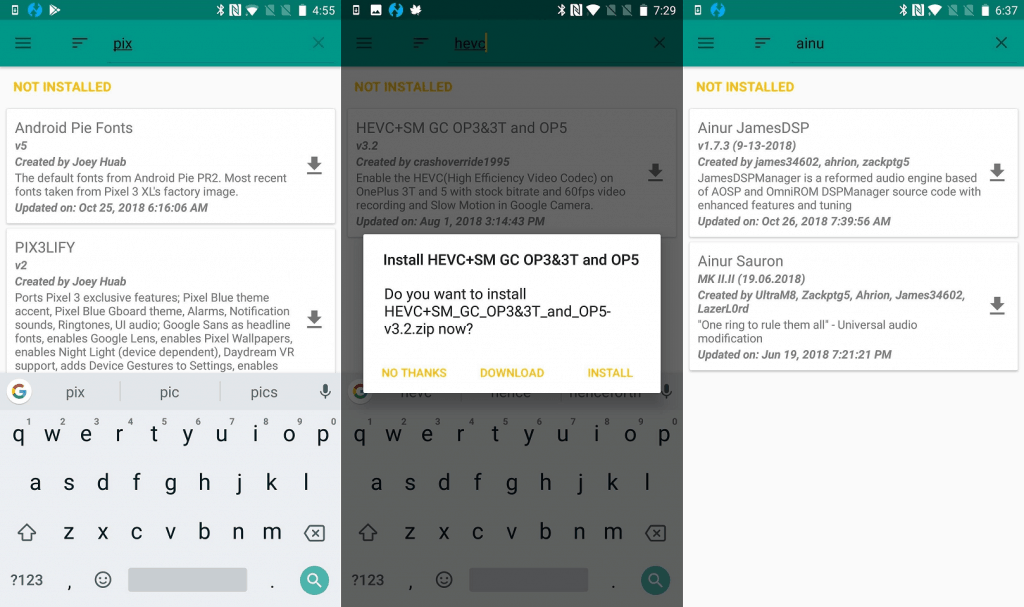
5.Magisk Modules
Apart from the SafetyNet bypass, what makes Magisk so tempting are the Magisk Modules. From bringing ad-blockers and audio equalizers, to Aggressive Doze Mode and overclocking the processor – there’s a Magisk Module for everything. This makes it even easier to understand what root access can bring to your device, and more importantly, allows you to manage the modules from a single place.
How to Install Magisk Framework on Android
Installing Magisk on an Android device that is already rooted is as simple as installing an app on your phone. However, if your phone has never been rooted before, there are a few things required before you can begin.
Requirements:
- A device running Android 4.2 and above.
- Bootloader of your Android device must be unlocked for the custom recovery to work.
- Custom recovery such as TWRP must be installed.
Step 1: Install custom recovery
TeamWin custom recovery has become the gold standard in the Android rooting community, and that’s the one you’ll probably use. Just like there are plenty of ways to get around the process of how to install Magisk framework on Android, so are the ways to get TWRP custom recovery, which mostly depends on your phone and manufacturer.
How to install TWRP custom recovery
Step 2: Install Magisk Manager
Once you have the custom TWRP installed on your Android device, time to get the Magisk Manager up and running. Before you can even begin to understand how to install Magisk framework, you need to get the Magisk Manager. Since the Magisk Manager is no longer available on the Google Play Store, you will need to manually install it. Once you have the “Unknown Sources” enabled, all you need to do is download and install the Magisk Manager APK.
Download Magisk Systemless Root
Step 3: Download Magisk Framework
Now that you have the Magisk Manager app downloaded and installed, it is time to get on with the part where you learn how to install Magisk framework on Android. In order to get started, here’s what you need to do:
- Open the Magisk Manager app that you recently installed.
- Tap on the Install button and select the Download Zip Only option to begin downloading the Magisk framework .zip file.
- Wait until you see the message at the bottom of the screen which denotes that the .zip file has been downloaded.
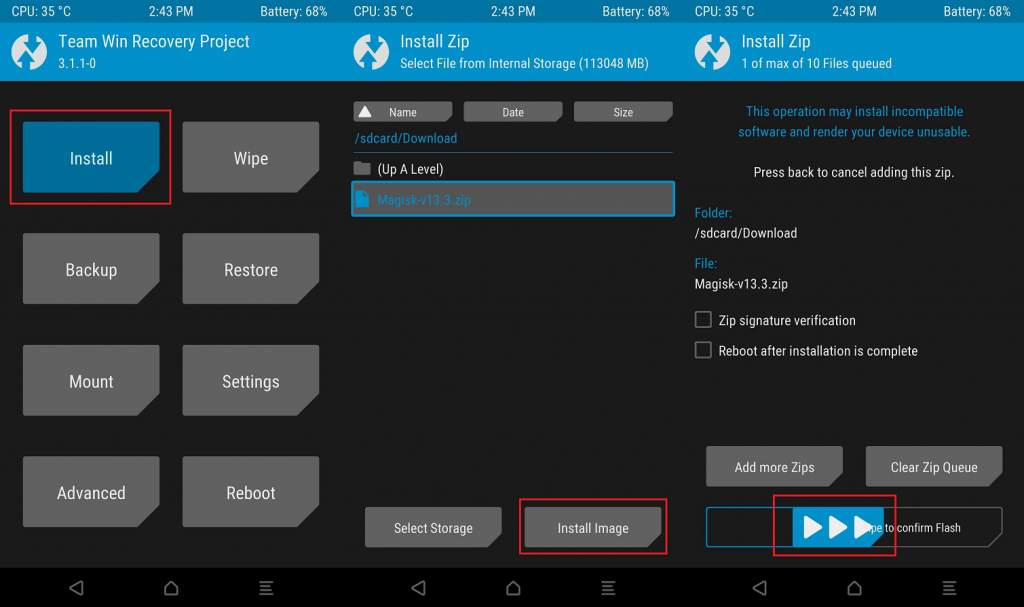
Step 4: Flash Magisk Framework
Now you have the framework file downloaded, just boot the device into recovery mode to flash the .zip file. Just enter TWRP mode and learn how to install Magisk framework on Android similar to flashing a custom ROM.

- Reboot the device into TWRP mode and tap on the Install button.
- Using the file directory, navigate your way to the location where you have the Magisk framework .zip file saved.
- Use the Swipe to confirm Flash button and wait while the process gets completed.
- Once the process is complete, press the Reboot System button.
Step 5: Verify the root and SafetyNet status on Magisk
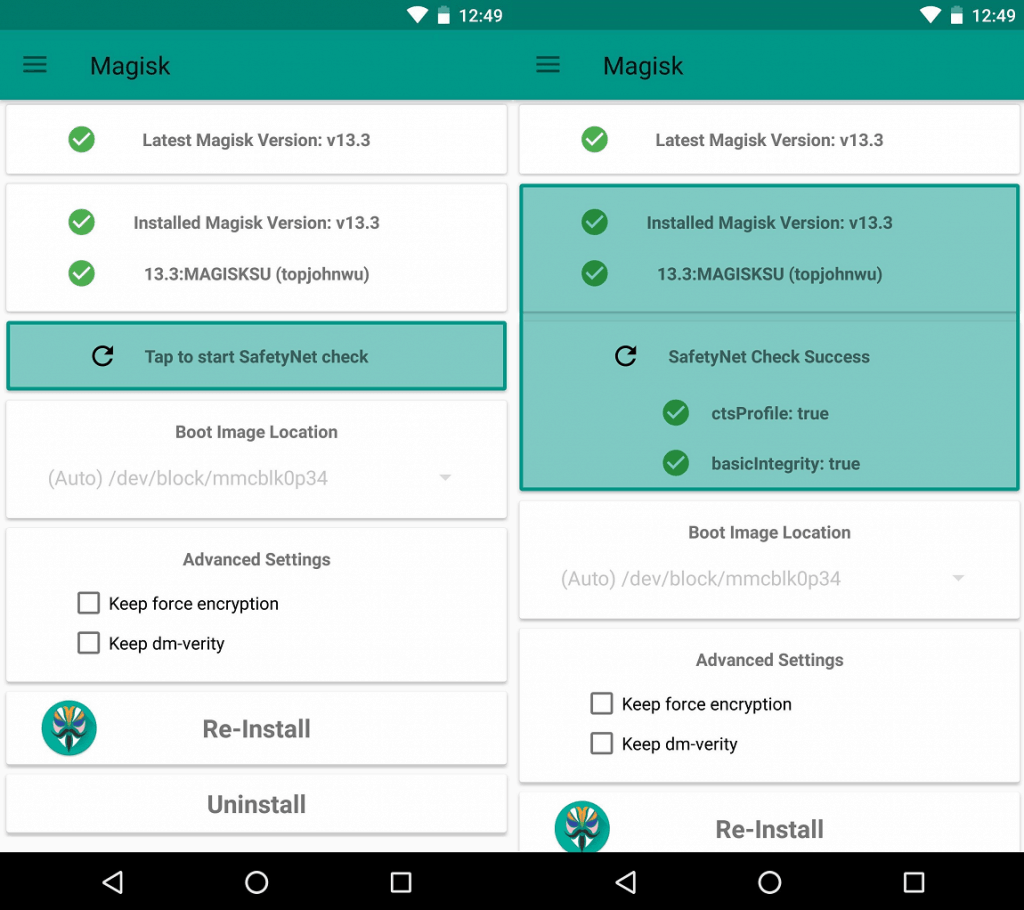
Once the phone reboots, head over to the Magisk Installer app to see if the Magisk framework is in place. Once you see the Green check marks appear, this should confirm that the systemless root is in place and working. Additionally, you can tap on the SafetyNet check button to confirm that the phone passes Google’s security checks easily.
Final Words
That’s it! You are now set to start using Magisk on your device and enjoy the power of systemless rooting. Now Magisk will not only allow you to grant Superuser access to apps and services, but also get more. Thanks to the Magisk Modules, you get hundreds of useful features and tweaks to get more from your device.Are you now on board using the future of Android devices rooting with Magisk framework without compromising security? Would you rather stick to the traditional methods of rooting and keep the features permanently on the device? Be sure to share your opinion in the comments section below, and if you have any questions regarding Magisk, ask away in the Updato Forums as well.