Are you wondering what the newly added Developer options in the menu is useful for and how to disable Developer options on Android? Here’s the ultimate guide on what this hidden gem in the Android OS is capable of, and different ways you can put it to good use.By default, the Developer options on all Android devices are hidden, but there are many reasons why you might need to turn them on. For instance, some useful tools will only work with Developer options enabled. A good example is the Fonepaw desktop application that recovers deleted text messages on your Android device. Android app builders will also need Developer mode turned on to be able to debug apps. The good news is that Google has made it super easy to understand how to disable Developer options as well. If at any point while using Developer options, you feel overwhelmed by the menu options or find it unsecured to use certain features, you can learn how to disable Developer options just as easily as you turned them on.
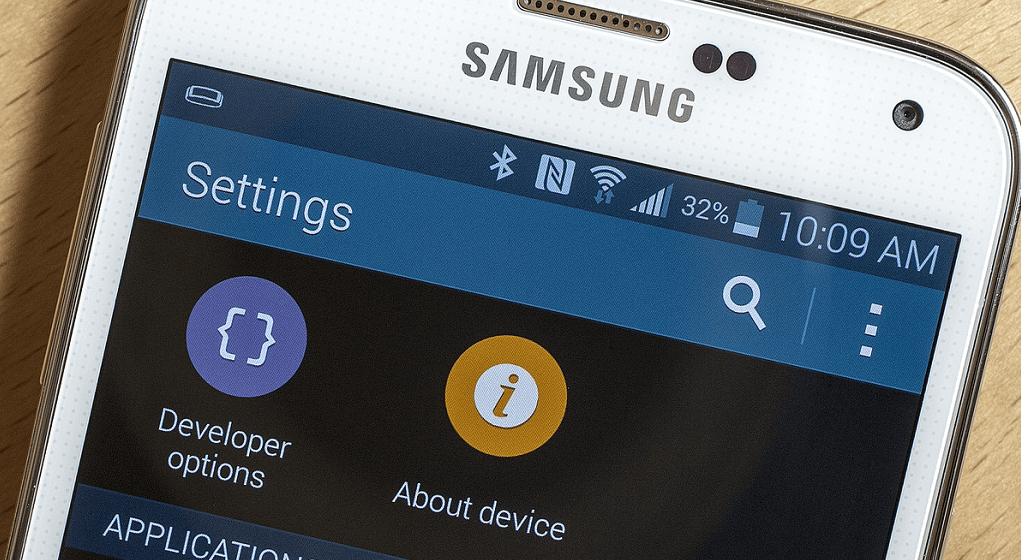
 Developer options will now be turned on, and it’ll be visible in the Settings menu (usually just above About phone) for you to access.
 Using the “Running services” tab in the Developer options menu, you can see the entire list of services running on your device, along with the RAM each app is using. Using options such as “Show Services in Use” and “Show Cached Processes”, you get a better handle on how the hardware (battery, RAM, and processor) is being utilized by your device.
 Possibly the single most useful feature for Android app developers and expert users, USB debugging is what allows the computer to “communicate” with your device. This feature paves the way for Android Debug Bridge (ADB) commands, which allows you to send and receive signals, along with the ability to send and receive files back and forth between the computer and the Android device.
 Simply use the Developer options menu to find the three options mentioned above in the “Drawing” tab. The value of all three options should be set to 1x by default, so go ahead and lower them (or disable them completely for best results), which should bring you some zippy performance in exchange of some unnecessary animation effects.
 Once again, scroll down the Developer options menu to find “Limit background processes” under the Apps section and tap on it. Set at default to “Standard limit”, you can choose to limit the background activity on your Android device to a selective number of processes (or No background processes) to reclaim useful battery life, RAM and processor usage.
 If you ever find yourself running out of space due to stubborn apps, head over to Developer options to find “Force allow apps on external” tab and enable it. You will now be able to head over to the Apps menu in Settings and use the “Move to SD card” option on virtually any app that is taking up too much real estate on your internal storage space.
 You need to start off by downloading a GPS location faker app from the Google Play Store, so simply download one of the best ones available. Once you have a location faker app installed on your device, head over to Developer options and access the “Mock location app” option and select your downloaded app from the pop-up menu.
 Head over to the Developer options and scroll all the way down to find Inactive apps menu, with the “Force activities to be resizable” option along with its toggle switch. Once enabled, the system will force even the non-multi-window compatible apps to surrender and bend to your will.
 By enabling this particular option from the Developer options menu, you get higher rendering quality, more frames per second when playing high-end games, and an overall smooth performance. Simply scroll down the Developer options screen to find “Force 4x MSAA” and enable it.
 Using the Developer options tab in the Settings app, scroll down to find “Stay awake” option and use the toggle switch next to it to enable it. Your Android device will now automatically keep the screen awake when the device is charging, so you can have it full viewing and operation mode when using on your work desk at the office. You also choose to understand how to disable Developer options menu option if you find it to be impacting the battery life too severely.
 The good news is that Google has made it super easy to understand how to disable Developer options as well. If at any point while using Developer options, you feel overwhelmed by the menu options or find it unsecured to use certain features, you can learn how to disable Developer options just as easily as you turned them on.
How to enable Developer options on Android
Some devices have the Developer options turned on natively, especially if you have a custom ROM such as CyanogenMod running on your Android device. In this case, the option can be found under Settings > System > Developer options. However, this won’t be the case for the majority of Android devices, so you will need to follow the steps given below to activate Developer options on your device.- Head over to the Settings app on your device using the app drawer or through the Quick Setting menu.
- Scroll down in the Settings menu to find the About phone menu option under the System cluster.
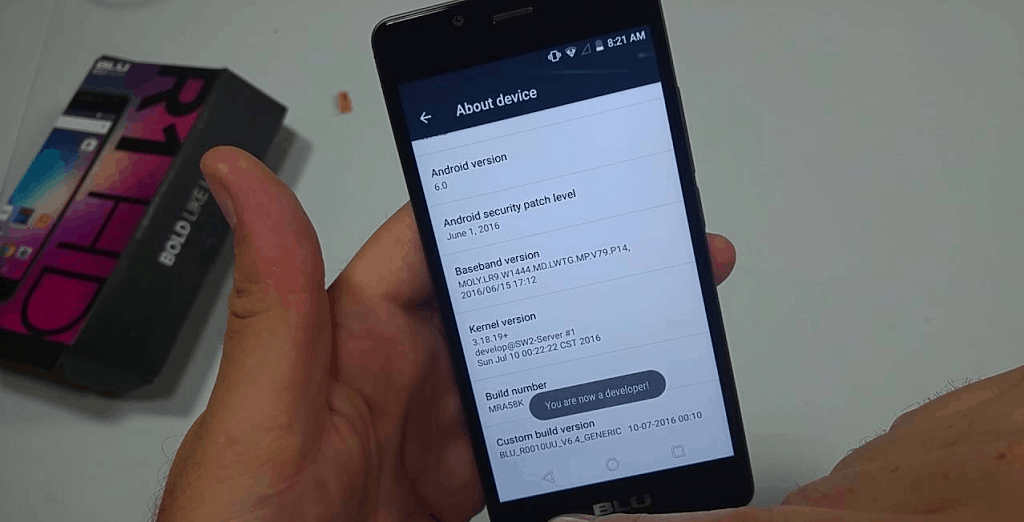
- In the resulting list, you should see a Build number option somewhere near the bottom of the list, along with other details regarding your device.
- Repetitively tap on Build number 7 times, at which point you will be notified by a pop-up window.
 Developer options will now be turned on, and it’ll be visible in the Settings menu (usually just above About phone) for you to access.
9 ways to use Developer options on Android
Now that you have the golden key to a treasure box full of cool new features, you might be tempted to try them all out. However, before you dive in head first, here are a some of the best things you can do with Developer options and clear instructions on how to use them the right way.1. View running processes and stats
If you ever felt that you need to look at process statistics of the apps installed on your device in detail? Developer options allow you to figure out what apps and services are running on your device and just how much memory they’re using up. This can be particularly important when you suspect that a certain app is overusing system resources and just need to shut it down.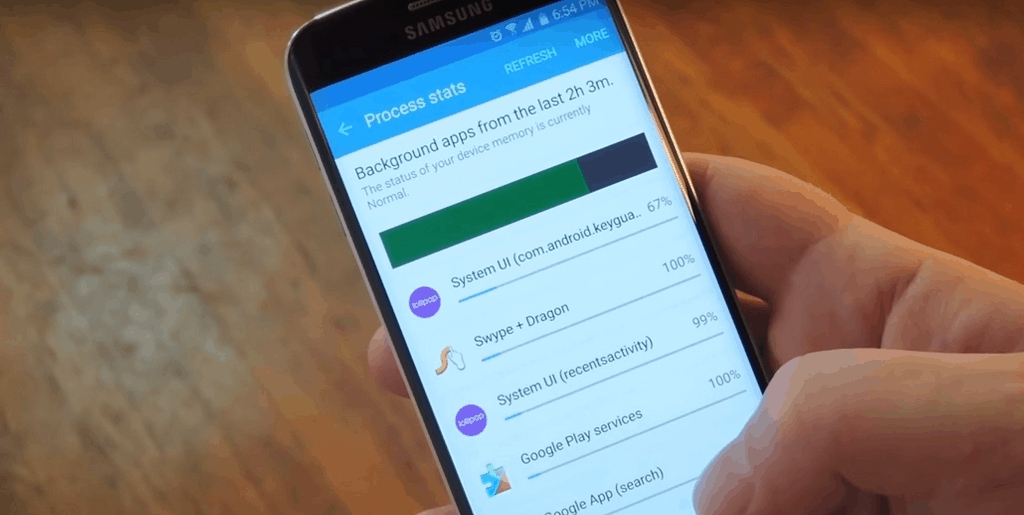 Using the “Running services” tab in the Developer options menu, you can see the entire list of services running on your device, along with the RAM each app is using. Using options such as “Show Services in Use” and “Show Cached Processes”, you get a better handle on how the hardware (battery, RAM, and processor) is being utilized by your device.
2. Enable USB debugging
Most Android system modifications such as rooting and custom ROMs that need your phone to be connected to a PC will also require that you turn USB debugging on. Before you can turn USB debugging on, you have to enable Developer options on your handset.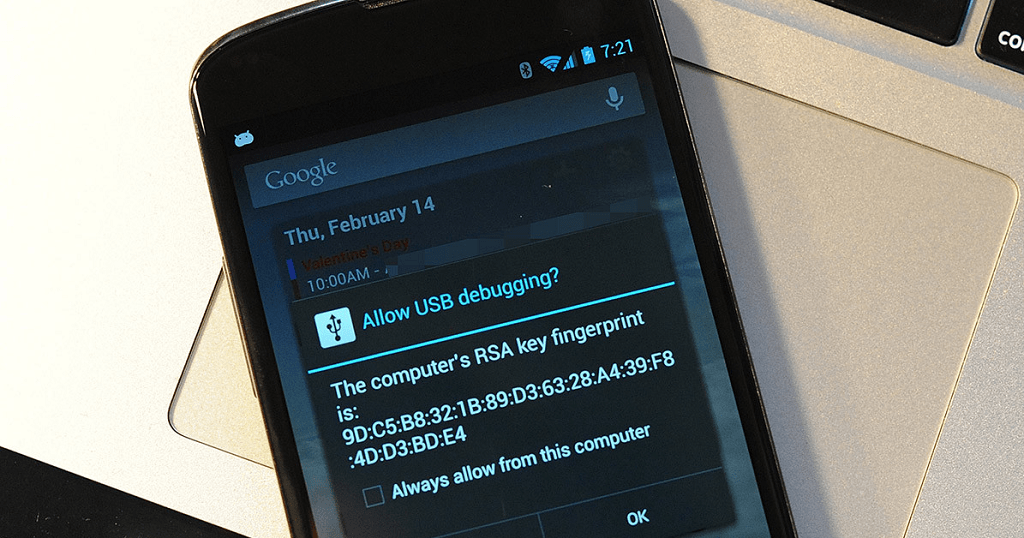 Possibly the single most useful feature for Android app developers and expert users, USB debugging is what allows the computer to “communicate” with your device. This feature paves the way for Android Debug Bridge (ADB) commands, which allows you to send and receive signals, along with the ability to send and receive files back and forth between the computer and the Android device.
3. Change animation speeds for better performance
How about changing the transitions you see each time you swipe between screens or open apps for a boost in device performance? By turning on the Developer options, you’ll be able to reduce Windows animation scale, Transition animation scale, and Animator duration scale – all of which together will help you speed up your device.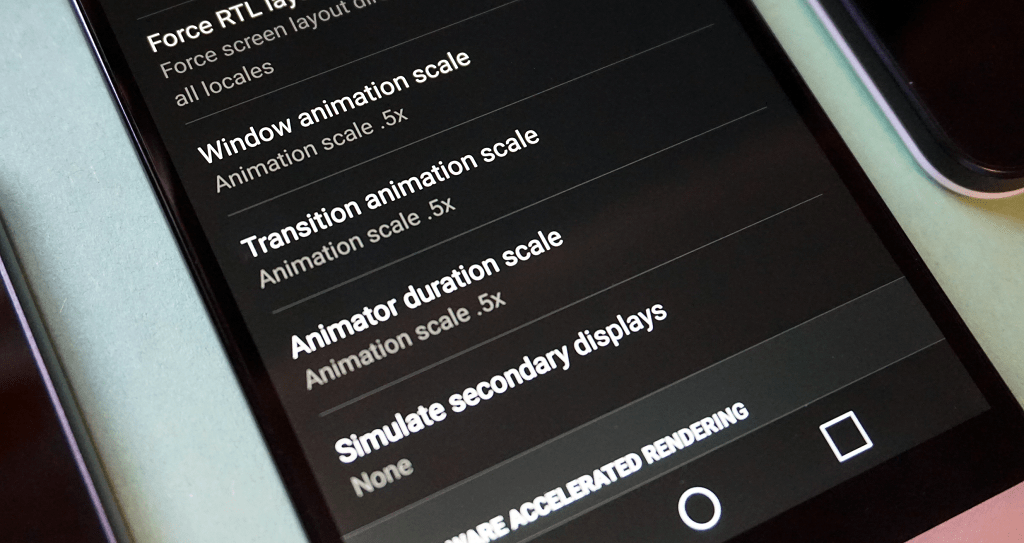 Simply use the Developer options menu to find the three options mentioned above in the “Drawing” tab. The value of all three options should be set to 1x by default, so go ahead and lower them (or disable them completely for best results), which should bring you some zippy performance in exchange of some unnecessary animation effects.
4. Limit background processes
If your Android device is showing signs of lag or stutter every now and then, you might want to disable some background services. Fortunately, Developer options save you the pain of clearing background apps manually by offering the feature to “Limit background processes” in the easiest way possible.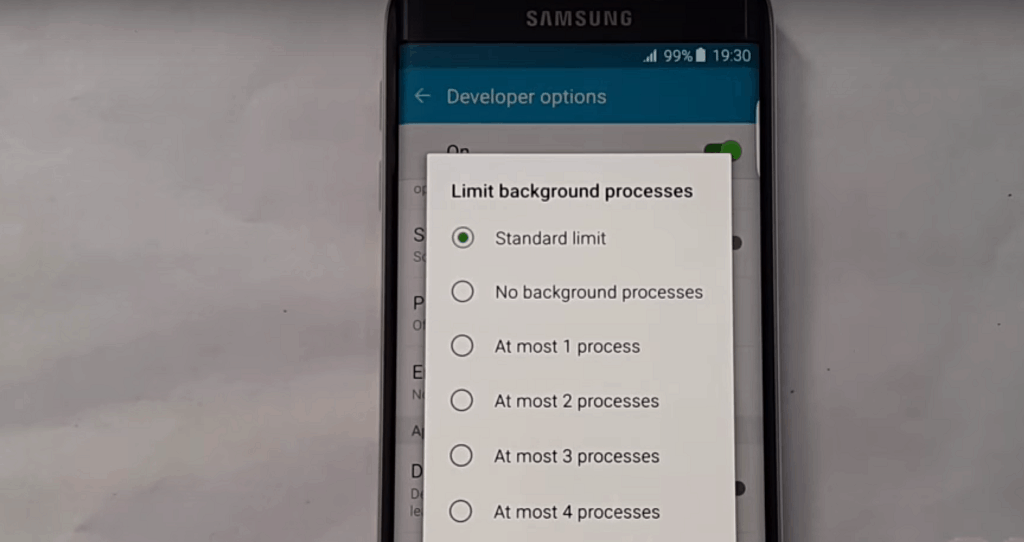 Once again, scroll down the Developer options menu to find “Limit background processes” under the Apps section and tap on it. Set at default to “Standard limit”, you can choose to limit the background activity on your Android device to a selective number of processes (or No background processes) to reclaim useful battery life, RAM and processor usage.
5. Installing any app to the SD card
As pleasant as would be to have every Android app come with the ability to be installed on the external storage, it sadly isn’t the reality. This is where Android gives the power back to you by including a feature in the Developer options to help you force allows apps to be installed onto the SD card of your Android device. If you ever find yourself running out of space due to stubborn apps, head over to Developer options to find “Force allow apps on external” tab and enable it. You will now be able to head over to the Apps menu in Settings and use the “Move to SD card” option on virtually any app that is taking up too much real estate on your internal storage space.
6. Fake your GPS location
Creating a fake geographical location for either getting the upper edge in Pokémon GO or accessing region-restricted services is the very reason we use VPN services. Surprisingly enough, Developer options, in combination with another app, gives you the all-powerful ability to create a mock GPS location for virtually any purpose. You need to start off by downloading a GPS location faker app from the Google Play Store, so simply download one of the best ones available. Once you have a location faker app installed on your device, head over to Developer options and access the “Mock location app” option and select your downloaded app from the pop-up menu.
7. Make all apps work in multi-window mode
This one will obviously be applicable to only multi-window supporting devices, aka Android 7.0 Nougat devices. Since multi-window is not yet natively supported by all apps, it might be a bummer for those who use the feature regularly. However, there’s a workaround the restrictions set by app developers, and the Developer options are your way through it.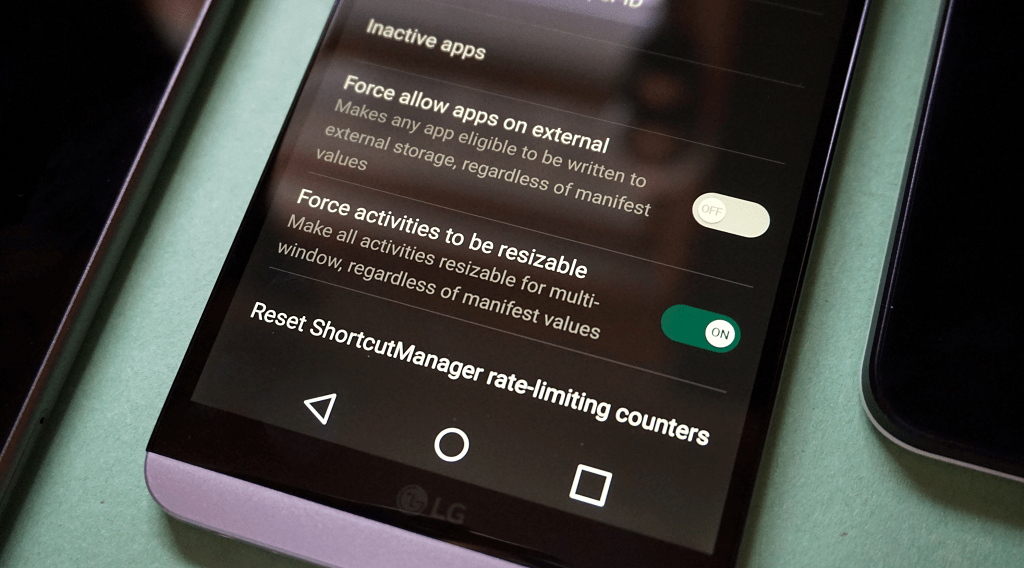 Head over to the Developer options and scroll all the way down to find Inactive apps menu, with the “Force activities to be resizable” option along with its toggle switch. Once enabled, the system will force even the non-multi-window compatible apps to surrender and bend to your will.
8. Enhance your Android gaming experience
While it would be unreal to expect your 5 years old Android device to run the latest graphics-intensive games buttery smooth, you deserve to have the best experience if your phone isn’t all that old. In order to help you bypass the hardware and software restrictions that the device manufacturer may have put forth, Developer options menu features the ability to enable MSAA for OpenGL games.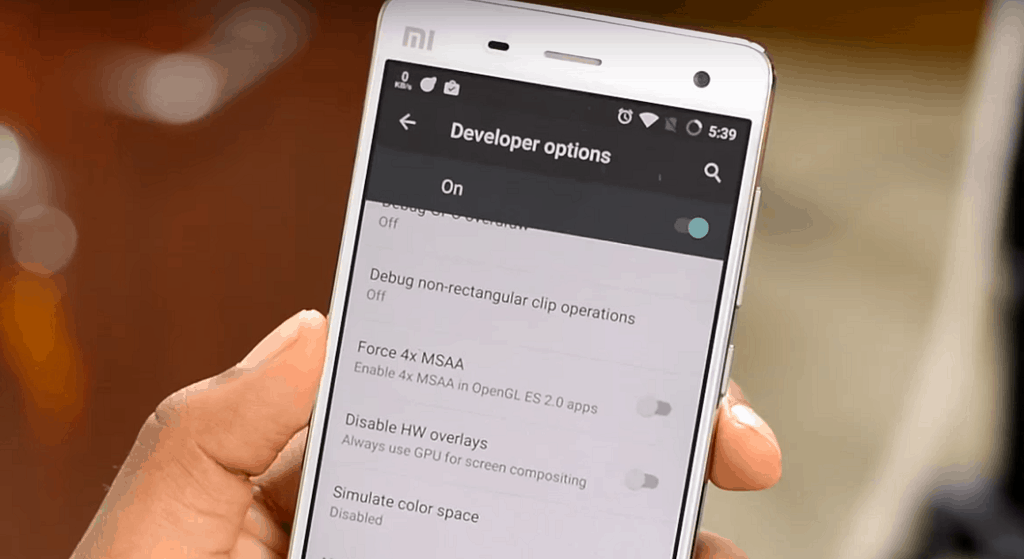 By enabling this particular option from the Developer options menu, you get higher rendering quality, more frames per second when playing high-end games, and an overall smooth performance. Simply scroll down the Developer options screen to find “Force 4x MSAA” and enable it.
9. Keep screen awake when charging
One of the more app developer friendly features that can be gold for regular users as well, is the ability to keep your device display awake when on charge. You can always change the screen duration time manually, this is far more convenient and does not hemorrhage too much of battery life since the phone is always in charge when the feature is activated.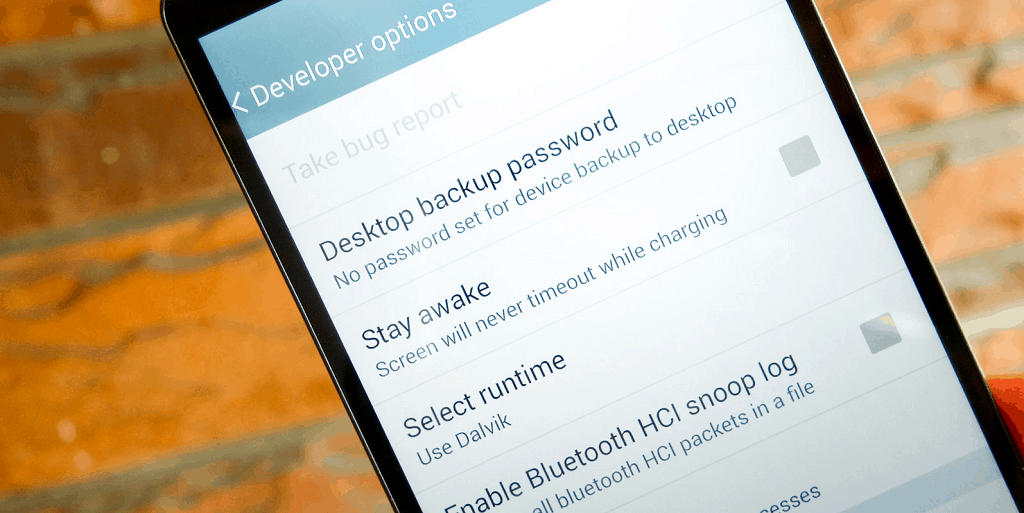 Using the Developer options tab in the Settings app, scroll down to find “Stay awake” option and use the toggle switch next to it to enable it. Your Android device will now automatically keep the screen awake when the device is charging, so you can have it full viewing and operation mode when using on your work desk at the office. You also choose to understand how to disable Developer options menu option if you find it to be impacting the battery life too severely.
How to disable Developer options on Android
After learning all the cool things that the Developer options have to offer, you might be excited to try them out. However, if you’re among the majority who are more than happy with the freedom that Android already provides, there is a way to go back to having a device that does not host a separate section of advanced options.Learning how to disable Developer options is just as easy as turning it on, so here’s how you do it:- Using the Quick Settings menu and the “gear” icon, or the app drawer itself, head over to the Settings app.
- Under the Device menu cluster, you’ll be able to find the Apps option. Tap on it and you should see the Apps screen which should show Downloaded, Running, and All apps.
- Under the All apps tab, scroll down further below and tap on Settings menu icon.
- Once you’ve accessed the Settings app menu, tap on the button that says Clear data then tap on Ok when asked to confirm your action.
- The Settings app will be restored to the default value and the Developer options item will now be disabled/absent from the Settings screen.
IMAGE SOURCE: Android Pit
Similar / posts
Unlock more on your phone: learn to enable, use, and disable ‘Developer options’ on Android
August 19th, 2016
Updated on August 29th, 2017
Unlock more on your phone: learn to enable, use, and disable ‘Developer options’ on Android
August 19th, 2016
Updated on August 29th, 2017
Unlock more on your phone: learn to enable, use, and disable ‘Developer options’ on Android
August 19th, 2016
Updated on August 29th, 2017